The Air in the Cupboard: Environmental Monitoring for a UK Homelab
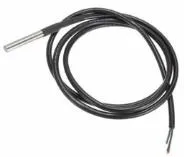
Photo: Andy Oakley, CC0, via Wikimedia Commons
A UK homelab rarely lives in a nice clean data centre. It lives in a cupboard under the stairs, a spare bedroom, a loft, a garage, or the airing cupboard next to the hot water cylinder. That is fine until January, when the room is cold and damp, or July, when the loft is a greenhouse. The kit keeps running, but the air around it is doing quiet damage.
What the air is doing
Condensation is the big one. Warm, moist air meets a cold surface and gives up its water. In a UK winter, an unheated garage or loft can be cold enough for that to happen on metal cases and heat sinks. Summer is the opposite problem: loft temperatures can climb past 40°C, drives run hot, and fans spin up. Dust is the slow third problem. Carpets, pets and open windows all feed it into filters and heat sinks.
You cannot fix the British weather. You can, however, measure the air in the places where your kit actually lives, and you can set alerts that give you time to act before a disk or a power supply has a bad week.
Sensors worth the money
You do not need lab equipment. A BME280 or SHT31 breakout, an ESP32 or Raspberry Pi, and a £10 to £20 spend will give you temperature and relative humidity. DHT22 sensors are cheaper but slower and less accurate; they are fine for trend monitoring, not for tight thresholds. Put the sensor where it can breathe, and keep it away from the heat of the Pi itself.
If you use an ESPHome board, you get Wi-Fi and MQTT without a cable. If you use a Pi, a simple Python script and a systemd timer will do. The important part is not the brand of sensor. It is that the reading is regular, labelled and stored somewhere you can graph it.
Placement beats precision
Placement matters more than the sensor's headline accuracy. Measure the air going into the case, the air coming out, and the room itself. A sensor taped to the top of a warm PSU is measuring the PSU, not the room. A sensor inside a sealed cupboard is measuring the cupboard. Use the intake reading to judge the air the fans are actually pulling in; use the exhaust reading to spot a blocked filter or a failing fan; use the room reading to decide whether the cupboard needs a vent.
Keep sensors out of direct sun, away from radiators, and off the floor where dust and cold air collect. If you have a rack, put one sensor near the cold aisle and one near the exhaust. If you have a single mini PC on a shelf, put the room sensor at the same height as the intake, not on top of the case where heat rises. Label everything. A metric called temperature without a location label is almost useless six months later.
Dew point is the number to watch
Relative humidity alone can mislead. Cold air at 80% RH may hold less water than warm air at 60%. The dew point tells you the temperature at which condensation starts. If the dew point in your cupboard is 17°C and the metal case is 12°C, you have a problem even if the RH number looks moderate.
Calculate it from temperature and humidity, or let the sensor firmware do it. For a home lab, a useful starting point is a warning when dew point goes above 16°C for 30 minutes, and a critical alert above 20°C. Adjust for your own room: a garage that sits at 5°C in winter needs different rules from a warm spare bedroom. The point is to watch the relationship between the air and the surfaces your kit presents to it.
Prometheus, Grafana and alerts that do not cry wolf
Export the readings as Prometheus metrics. The simplest route is the node_exporter textfile collector: a script writes a .prom file every minute, and node_exporter serves it. Use clear metric names such as homelab_air_temperature_celsius, homelab_air_humidity_percent and homelab_air_dew_point_celsius. Label by location, for example room cupboard and sensor intake.
In Grafana, plot temperature and dew point on the same panel so you can see the gap. Add a humidity panel, but do not alert on a single spike. A cupboard door opening can move the reading for a few minutes. Set for: durations in your alert rules.
- alert: HomelabDewPointHigh
  expr: homelab_air_dew_point_celsius > 16
  for: 30m
Use Alertmanager routes so a critical dew-point alert goes to your phone, while a temperature warning goes to email. Include the sensor label in the alert so you know whether it is the room, the intake or the exhaust. If you run multiple sites, add a site label as well. This is the same discipline you would apply to any other Prometheus alert: name the thing, label the thing, and give the alert enough time to be true.
Practical fixes
Once you can see the numbers, the fixes are usually boring. Add a vent to the cupboard. Raise the kit off a cold floor. Fit a dust filter and clean it. Improve positive pressure so dust is pushed out rather than pulled in. In summer, move the intake to cooler air or add a fan; in winter, avoid sealing a damp room tight. Do not put a dehumidifier on a timer without checking the dew point first.
A small fan moving air through a cupboard can be more effective than a bigger heatsink. A £12 sensor will not stop condensation, but it will tell you when to act. That is usually enough.
Keep it running
Clean filters on a schedule. Check sensor batteries and Wi-Fi signal. Calibrate against a known thermometer once a year if the readings matter to you. Keep a short note in your runbook explaining what each sensor location means and what the alert thresholds are. The air in a UK homelab changes with the seasons, and your monitoring should change with it.